Building a Simple Pegboard Tool Wall for a Garage With Sloped Studs
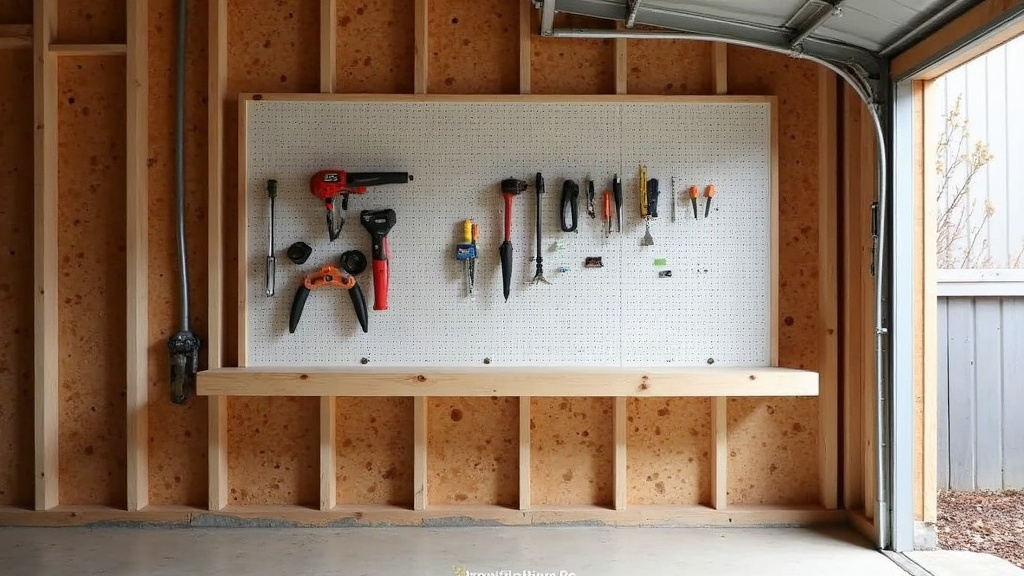
Building a pegboard tool wall on sloped or uneven studs isn’t a dealbreaker. You just need to add a flat mounting surface first. Most older garages, sheds, and unfinished additions were never framed with a laser and a level in mind, so studs lean, twist, or sit at slightly different depths than their neighbors. The fix is straightforward: install furring strips, shim them level behind the pegboard, then mount the panel as usual. Below is the full process, from checking your wall to hanging your first hook.
Why Sloped Studs Are a Problem for Pegboard
Pegboard needs a consistent gap behind it (about ¾ inch) so hooks and brackets can slide in and actually grip something. Screw a sheet straight onto studs that aren’t in the same plane, and you’ll end up with:
- Pegboard that bows or cracks under pressure
- Hooks popping loose because the panel isn’t parallel to the wall
- Gaps or pinch points wherever the board meets the uneven framing
Trying to force a rigid 4x8 sheet flat against a wavy wall just doesn’t work. Correct the wall first with a simple frame of strips, and everything after that gets easier.
What You’ll Need
- ½-inch or ¼-inch pegboard sheet(s), sized to your space
- 1x3 or 1x2 furring strips (wood, or pegboard-specific spacer strips)
- Cedar shims or thin plywood scraps for leveling
- 2.5-inch deck screws (strips into studs) and 1.25-inch screws (pegboard into strips)
- A 4-foot level, stud finder, and tape measure
- Pegboard hooks, bins, and brackets
Step 1: Map Out Your Studs
Run a stud finder across the whole wall section you plan to cover and mark centerlines with a pencil or painter’s tape. Most garage walls are framed 16 inches on center, but don’t just assume it. Older structures often drift from that spec, sometimes by a couple of inches.
Step 2: Check for Slope With a Straightedge
Hold a long level, or a straight 2x4 if that’s what you’ve got, vertically and horizontally against several studs. Note which ones bow inward and need shimming out, and which are already flush. This little map is what tells you exactly where the shims go later, so don’t skip it.
Step 3: Install Horizontal Furring Strips
Skip vertical strips. They tend to twist right along with the studs behind them. Instead, run horizontal 1x3 strips across the top, middle, and bottom of your pegboard area, screwed into every stud they cross. Horizontal strips:
- Create a more forgiving, adjustable frame
- Spread the pegboard’s weight evenly
- Make shimming each contact point a lot easier
Space the strips roughly every 16 to 24 inches vertically, lining up with wherever you’ll want solid backing for heavier tools.
Step 4: Shim Each Contact Point
At every stud location, hold your level against the furring strip while you drive the screw. If a stud sits back from your reference plane, even by a sliver, slip a shim behind the strip before you tighten anything down. Recheck level after each screw. It only takes a few extra seconds, and it saves you from a warped panel three weeks from now.
Step 5: Verify the Whole Frame Is Flat
Once all the strips are up, run your level across the whole frame in several directions: horizontal, vertical, diagonal. A small dip here and there is fine. Anything over ⅛ inch across a 4-foot span, though, needs another round of shimming.
Step 6: Mount the Pegboard
With the frame flat, screw the pegboard sheet into the furring strips, never directly into drywall or bare studs. Use screws with finish washers, or pegboard-specific clips, so the panel sits flush without crushing the material. Start in one corner and work outward, checking alignment as you go rather than at the end.
Tips for Long-Term Durability
- Seal edges: A thin bead of wood glue or some edge banding on raw pegboard edges keeps them from fraying down the road.
- Support weight zones: Add an extra strip or two behind spots holding power tools or anything with real heft.
- Paint before hanging: Priming and painting pegboard flat on sawhorses beats trying to cut in around hooks and brackets later.
- Leave expansion room: Don’t crank the screws bone-tight. Wood panels move a little with humidity, and they need somewhere to go.
Common Mistakes to Avoid
- Eyeballing it and assuming “close enough” studs will hold up over time
- Grabbing drywall screws instead of real wood screws for the strips
- Forgetting the ¾-inch clearance standard pegboard hooks actually need
- Mounting straight over insulation or a vapor barrier with nothing solid behind it
Conclusion
A sloped or uneven garage wall really doesn’t have to sink your pegboard plans. Build a leveled frame of shimmed furring strips first, and you’ve got a flat, dependable base that makes the rest of the job almost easy. The extra hour spent fussing over level pays for itself: a tool wall that stays flat, holds real weight, and still looks sharp years down the line.